This page is to illustrate the steps taken to swap out the mushy dual stage brake booster for a firmer single stage system on my 2000 Impreza RS. I will not lie to you- this will not be easy. The change in braking performance really will only be felt, not actually improved, so some people question the need to change out the booster. I do not ever want to do this modification again if I do not have to, but I am impressed with the results. I now have a total package of brake booster, stainless steel lines, good full synthetic fluid, and upgraded rotors, and I am very happy with the package results. Very few tools are needed for this modification, but a great deal of patience will be necessary, as will about 3 to 4 hours for total swap and brake bleeding time. Any questions or comments I would be happy to try and answer.
The Part Numbers
Single Stage Brake Booster 26402FA071
Corresponding Master Cylinder 26401AA231
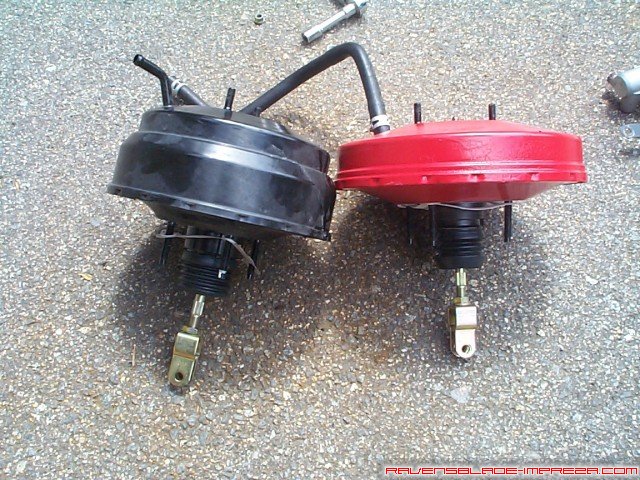
The first few pictures will be comparison photos. In this case, we have a comparison of the thickness of the stock dual stage booster on the left and the new single stage booster on the right. It is red only because that was the only color of heat-resistant rustproof paint I had to use- they are normally black in color.
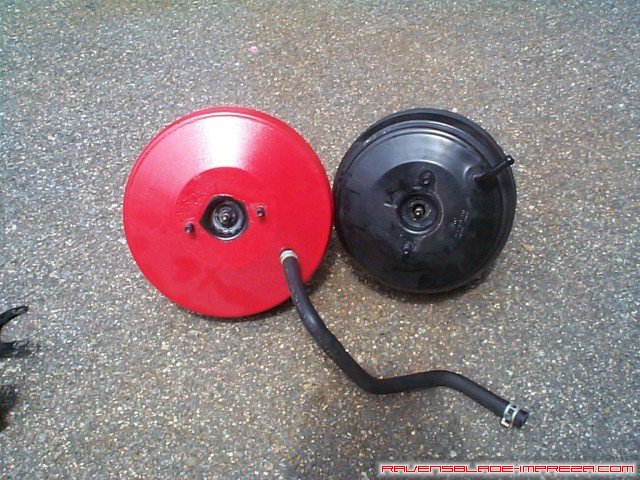
This is a view of the diameter difference- the single stage booster is slightly larger, but will still fit in the space allotted in the engine bay. You will more than likely loose a layer or two of skin getting it in place, but it will fit. The black tubing on the single stage booster is just the vaccuum tube off of the engine. Engine vaccuum is what provides the "boost" of the brake booster.
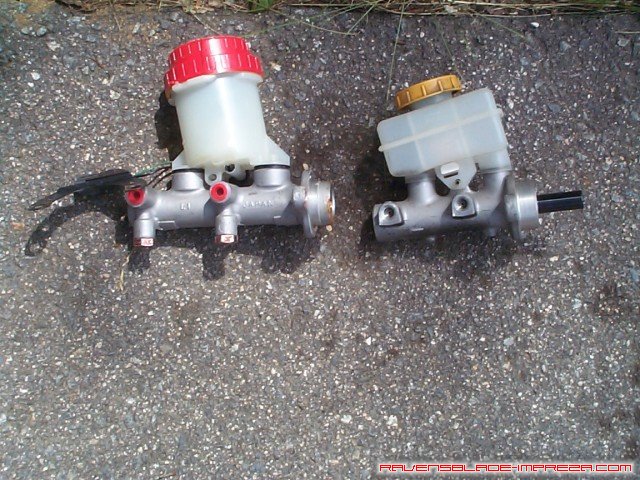
This shows why the stock master cylinder will not work- there is a long extension on the end of it (the black cylinder in the picture) that is incompatible with the single stage booster. Another item of note is the two extra brakeline holes on my master cylinder. If you get one of the older boosters, it will have four holes- the bottom two may be plugged as I did, using large bolts and teflon tape to leakproof the seal. Older boosters and master cylinders a dime a dozen in the junkyards- I paid about $30 for both pieces!
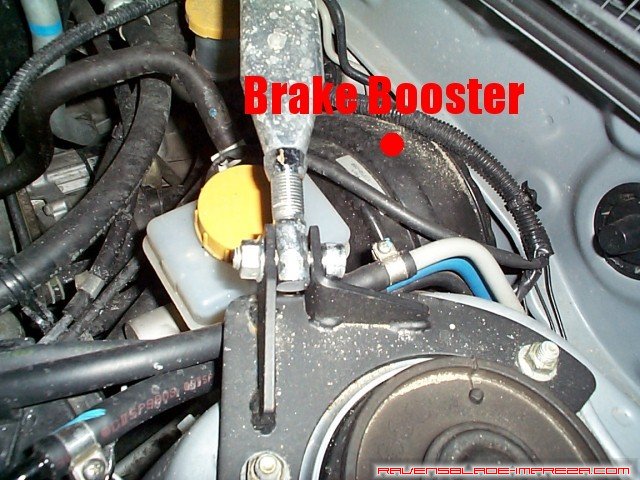
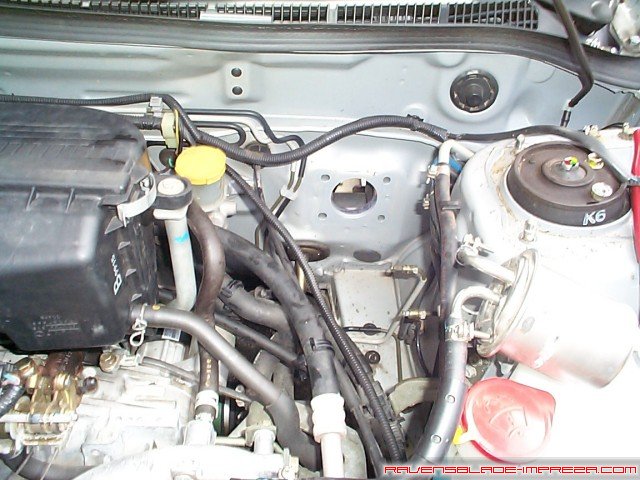
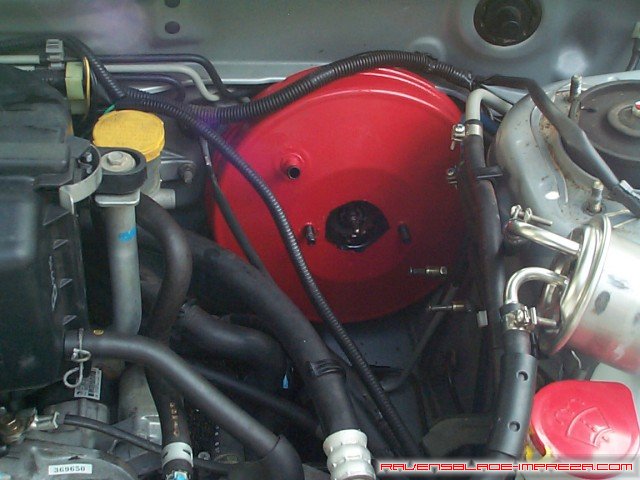
This is just to illustrate the location of the brake booster in the engine bay- ignore the strut tower bar.
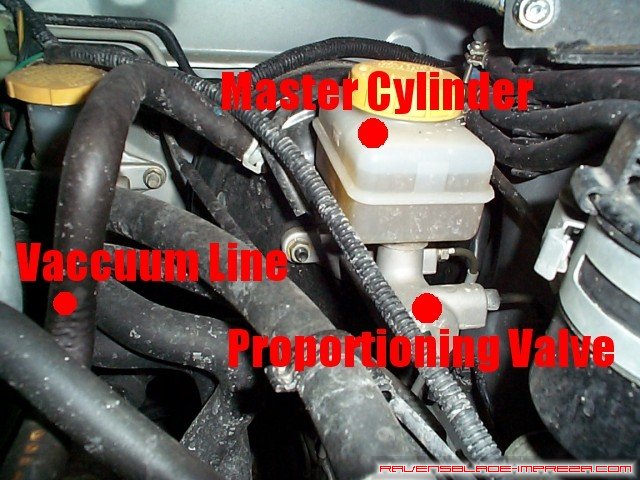
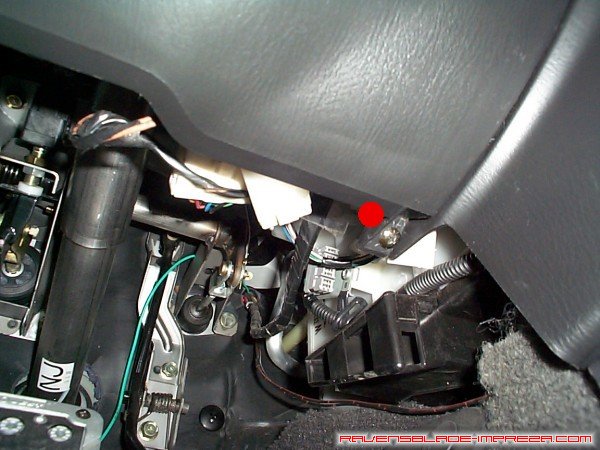
This is another roadmap picture, illustrating the major points of interest to us in the engine bay. However, this mod starts out in the passenger compartment of the vehicle, just above the driver's feet.
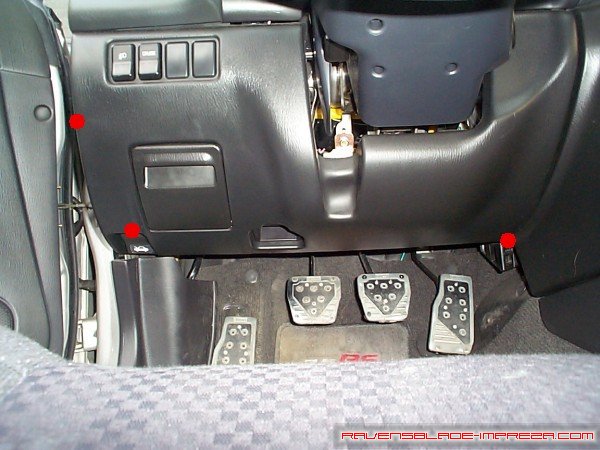
In this picture, you can see the plastic trim panel that covers the area underneath your steering colum. The three red dots mark the approximate location of the fasteners holding this piece on; 2 screws and one plastic trim plug. In addition to these 3 fasteners, there are two 'clips' on either side of the opening for the steering wheel. These will just pull right out once the three fasteners are removed.
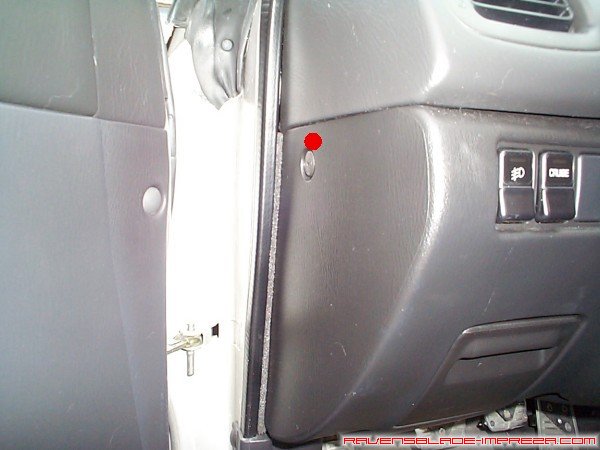
In this picture, you can see the plastic trim plug's location (right next to the red dot). You need to put a phillips (+) headed screwdriver in and turn about 1/4 of a turn. The center piece will pop up a little bit, and you can pull it out. Gently tug on the remaining outside piece, and it will come right out.
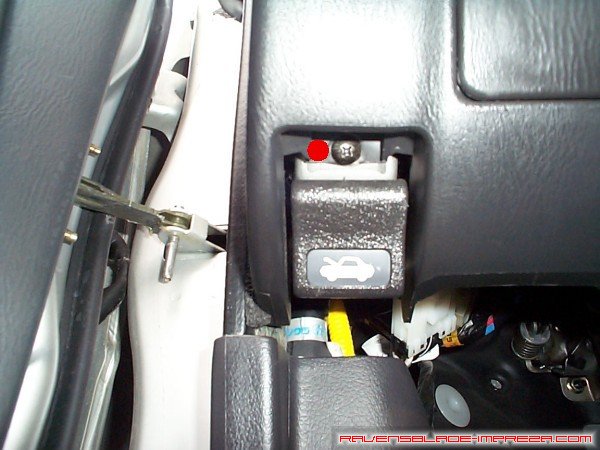
In this picture, you see one of the two screws, right by the pull for the hood release. Just unscrew that and put it aside.
The red dot marks the location of the second screw holding the dash trim on. Unscrew this last screw, and then pull the whole sheet of plastic out towards the driver's seat gently. Be careful! The harnesses for the foglights, cruise control, and the OBD-II diagnostic port all are attached to the plastic! Gently remove them and get the whole trim piece out of your way.
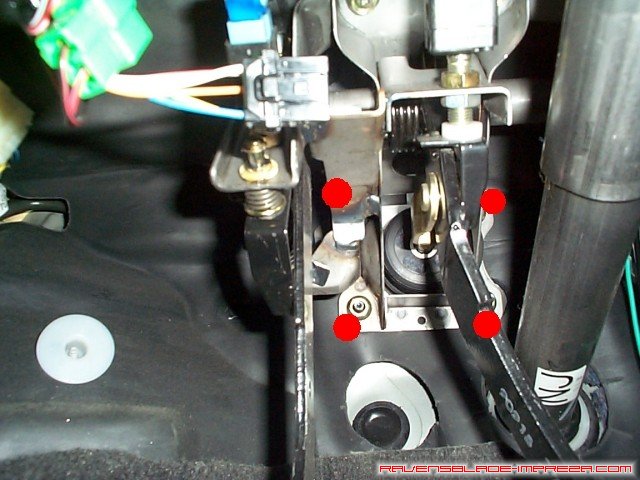
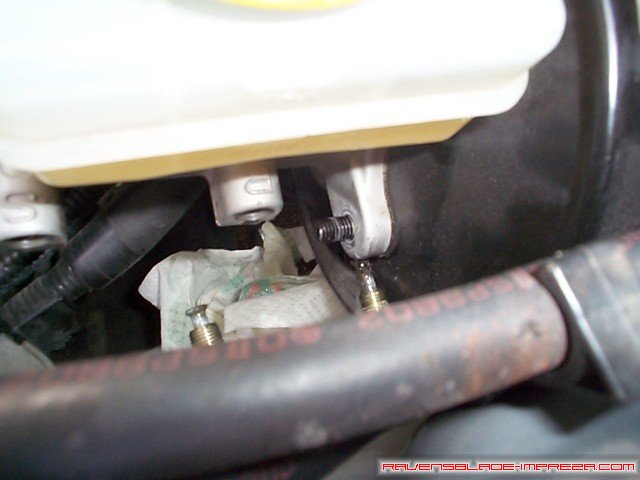
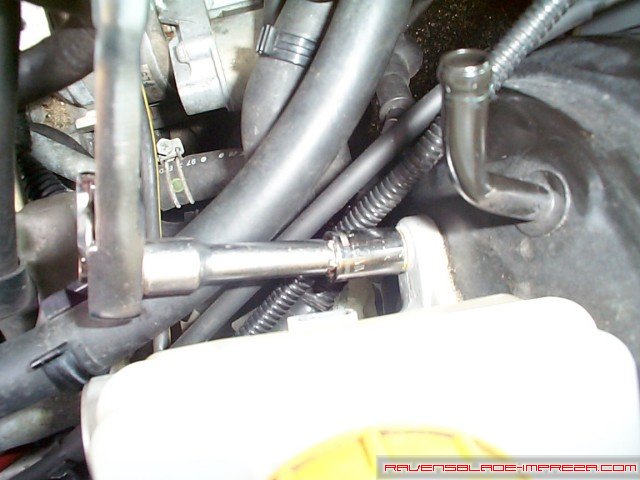
This photo illustrates the four nuts holding the brake booster to the firewall- these are all 12mm nuts. Three are plainly visible, one is much harder to get at. That would be the top left hand corner nut. It is behind the ten inch long metal brace that you can see under the top left red dot.

This was a VERY hard picture to get- there is not much room under the dash. This is a picture of the hard nut to get at. I have marked the top part of the brake pedal as a reference point to the nut's location.
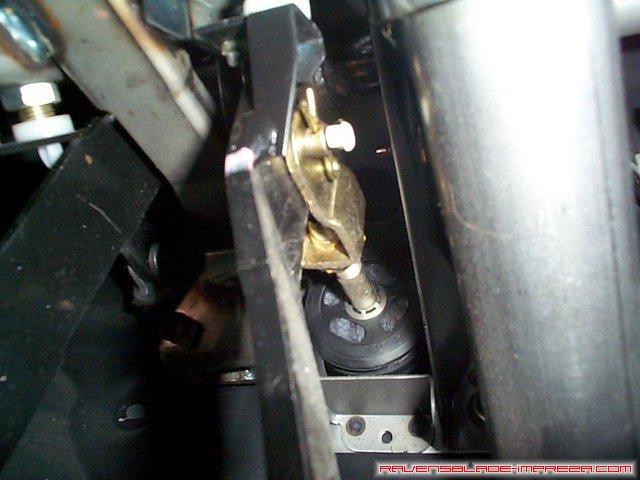
With the booster unbolted from the firewall, it is time to remove the last thing holding it in the vehicle. If you look up on the right side of the brake pedal and follow the bracket the pedal is attached to all the way up, you will see a cotter pin.

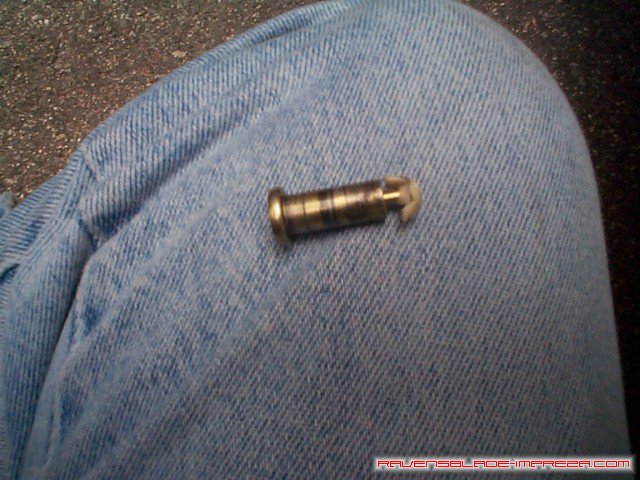
This is the cotter pin. Grab a pair of small pliers and pull on it gently and it will simply pop right off.
Now that the cotter pin is removed, there is one more trick to getting the pivot pin out. There is a set of white nylon locks that hold the pivot pin in even if the cotter pin were to fall out. It makes it a pain to remove, but a good added safety measure. You need to squeeze the white nylon locks down while you pull the pin out from the other side.
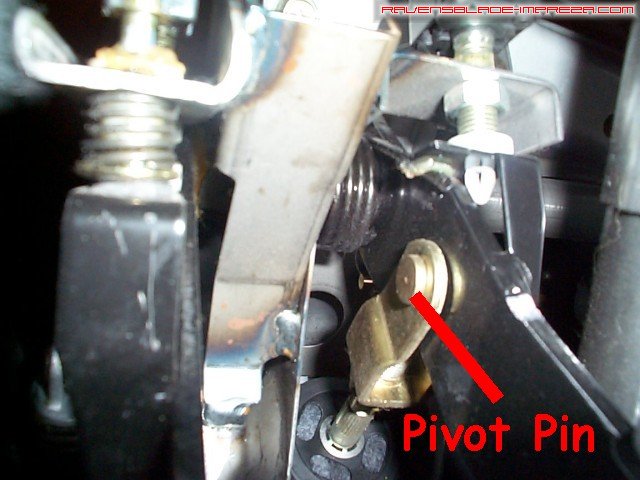
And this is the other side. You can see the far end of the pivot pin. While squeezing on the nylon locks, simply pull on this end and wiggle alot, and the pivot pin will pop out.
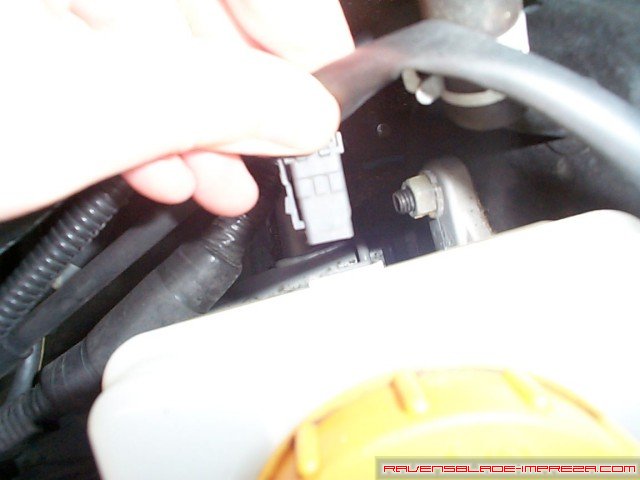
On the side of the stock master cylinder is a sensor that needs to be unplugged. This sensor tells you when your brake fluid is WAY to low, so it is a very good sensor to have.
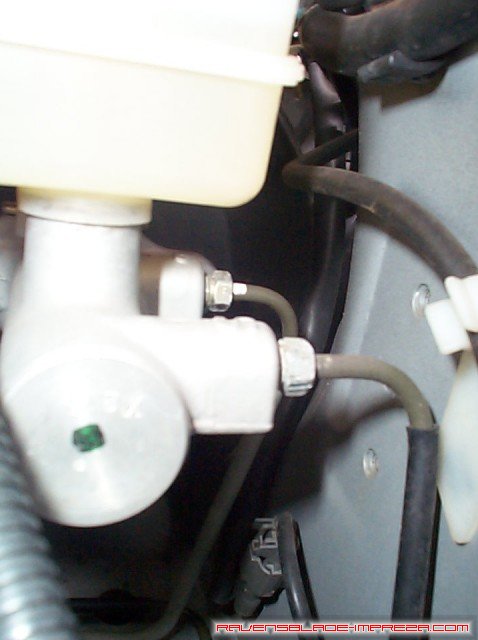
This picture illustrates the two 10mm nuts that head out of the proportioning valve and lead to the ABS system pump. Righty tighty, lefty loosy applies to these nuts. Of course it is not that easy- there is always a trick to things.
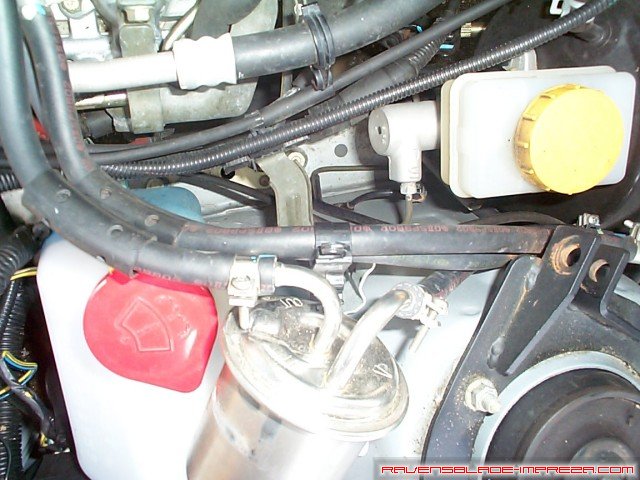
And here is the trick- make life MUCH easier on yourself, and remove the clamp holding your fuel filter in and swing it out of the way. This will provide you with plenty of room to unbolt the brake line nuts. As you back them out, you will lose some brake fluid- it is a fact of life. Just have some rags handy to clean it up- not very much will come out.
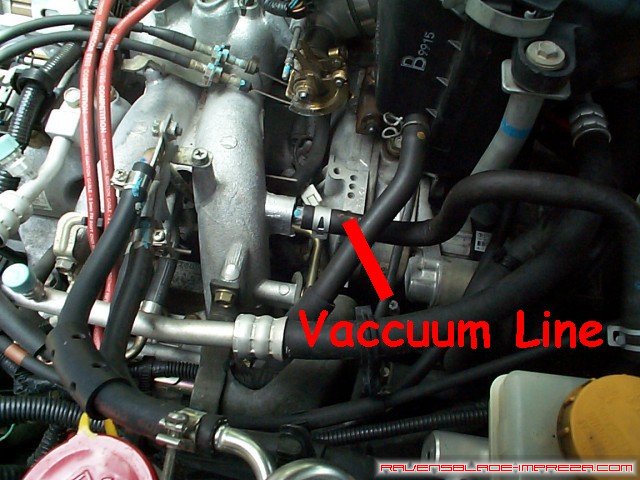
The next step is to remove the vaccuum line from the brake booster to the connection to the engine. It is fairly easy to tell which hose to remove. Simply follow it back and remove it from the engine by removing the hose clamp and pulling. You will get an interesting "whoosh" sound as all the vaccuum in the booster is replaced with air. I reused the vaccuum line from my car as it was much newer than the one that came with the booster from the junkyard. If you get a new booster and it comes with a brand new line, it may make sense to use that one instead- your call.
With the brakelines and vaccuum line removed, you should remove the master cylinder assembly from the brake booster. There are two 12mm nuts holding the two together, one on the right-
And one on the left. After removing these, pull towards the front of the car to remove the assembly from the booster, and towards the passenger side so that the brake lines will pop free.
Now, with that assembly free, pull, kick, fight, scream, swear, and tug a bit and you will (eventually) get the stock brake booster out of the car. I invented words when I removed this thing, so be prepared for something of an epic saga. I doubt there will be any Stygian witches or Kraken involved, but any blood loss you incur will probably be due to either this stage of the process or the insertion of the new single stage booster.
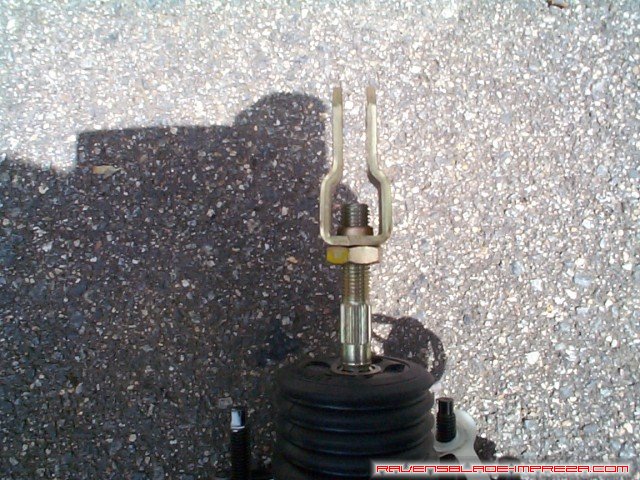
If at this point you are not heading out to have stitches put in any major lacerations due to the firewall, take a moment to compare the business end of the new booster to the stock one. There is a threaded rod with a threaded bracket that the pivot pin went through and a nut here. Take your time to ensure the new booster is adjusted in a similar manner to the old one, or you will have the brakelights coming on without pressing the peadal, the brakes always applied just a bit, or brakes that engage too late. If you need to adjust it, loosen the large nut, turn the bracket to the proper height, and tighten the nut back down.
With that done, it is time to invent new words again. Fight the new single stage booster through the firewall opening (it will actually be a bit easier, as the single stage booster is smaller) and go through to the passenger comapartment, lining up the bracket with the top of the brake pedal bracket, and pull it through. Basically, from this point on out, you just reverse your steps- reattach your vaccuum line, the brake lines, the sensor, the pivot pin and it's cotter pin, and then finally rebolt the booster to the firewall firmly.

From here, the painful parts are done. You will need to fill up the brake fluid reservoir and prime the master cylinder. Basically, this is much like bleeding the brakes (instructions are available on that here). Basically, you will need to open one of the two brakelines off of the master cylinder a bit while someone presses and hold the brake pedal to the floor. When they do this, you should get a great whoosh of brake fluid out of the opening. Quickly tighten the nut back down, and then have them let go of the brake pedal. Repeat the process just to be certain, then do the same to the other line. This will make a mess, but far less of a mess than if your brakes were to fail. After priming the proportioning rail, you will need to bleed out the brake system fully before taking the car out for a test drive, as there will still be a great deal of air trapped in the system. You can find out how to bleed the brakes by clicking here. And with that, you are finished. Enjoy!
Standard Disclaimer: Modification of your car involves risks and may void your warranty. I can not be held responsible for the modifications you consciously decide to undertake nor for the results of doing so.
|
|
