Just another informational page on how to install the Whiteline Anti Lift Kit. My thanks to BlueScooby for all his help with the install! Any questions or comments? Please feel free to email and ask.
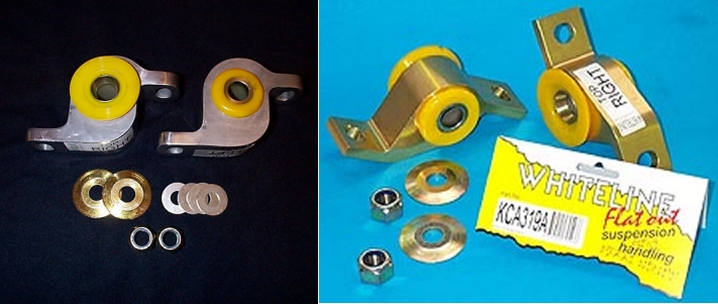
Well, I suppose we should start this out with a picture of what the Anti Lift Kit looks like. The 'old' kit on the left, the 'new' kit on the right; they are essentially identical. As for the "what it does" the anti-lift kit is designed to add 0.5 degrees of static caster to both front wheels while introducing a substantial amount of front anti-lift. The low compliance polyeurethane bushings will also maintain higher dynamic positive caster. By changing the front control arm geometry, the anti lift kit opposes front end lift under acceleration. This leads to superior traction under power during cornering, dramatically reducing understeer and front wheel spin. The additional castor also serves to dramatically sharpen initial turn-in response and allowing for greater speed through corners. Having also owned a front wheel drive Impreza and having experienced firsthand front wheel "skip" I would highly recommend this kit for any non All Wheel Drive Impreza out on the road today.
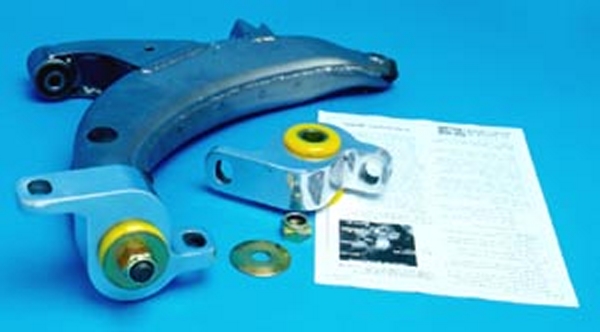
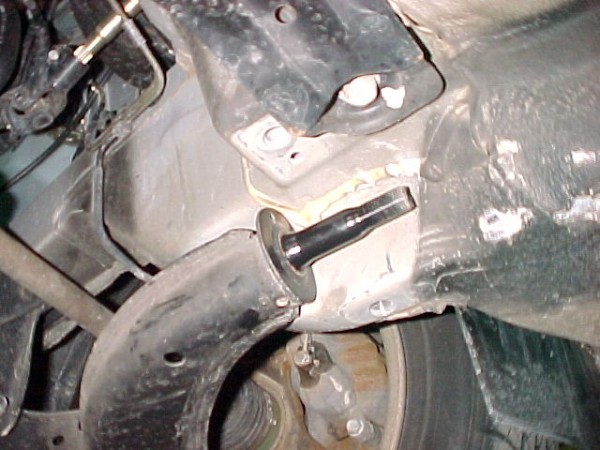
In the above picture, you can see what would be the passenger side control arm, with the Anti Lift Kit assembled. As it lays there on the table is how you would see it on the car if you were behind the wheel well looking down from above (if you could do such a thing). The far right "point" is where the control arm attaches to the wheel hub. The stock mounts will look almost the same when you get under the car. This isn't going to be easy, I'm not going to lie... you need 2 people. Put the front end up on jackstand on the stock jacking points, so the front suspension hangs free.
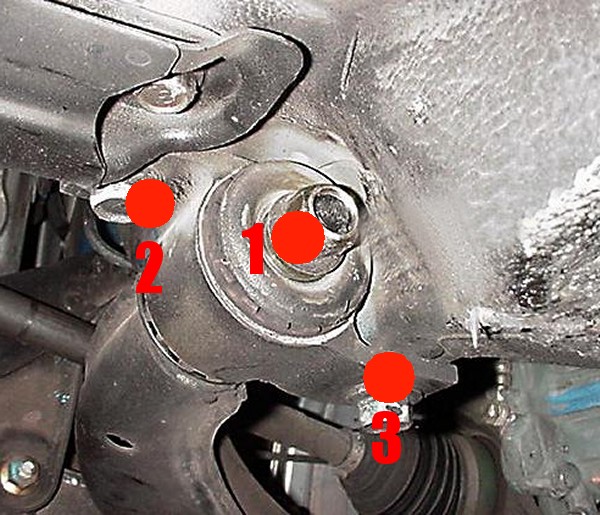
Then, remove the two bolts that hold the stock mount to the body of the car first (numbers 2 and 3), the location of which are seen above. Pay special attention to the crossmember right by number 2; you will have to wiggle the ALK mount in around that crossmember to get the mount to lay flat when you reassemble everything). With that done, you will probably need to pry the control arm away from the body of the car to slip a socket over the big nut on the end (number 1). It's going to take a fair bit of work to get that nut off (like I said, the air tools we used to do mine wouldn't take it off)... it will come off though. Pay attention... the ALK "block" only fits on one side and only one way.. match the correct side up to the stock unit. Now it's time for the ALK... the section below will detail how to put the pieces together and install them.
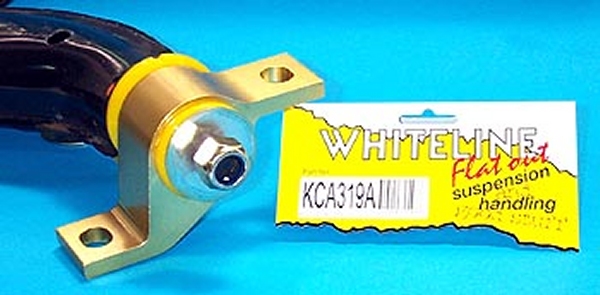
This is a close up picture of the "new" ALK, but the "old" version goes together the same. Please note that this picture is for a left side mount, but the pieces go on the same regardless.
When you go to put the ALK kit on, you want to first grease up the yellow poly bushing with some form of graphite-based lubricant. Clean off the post on the control arm thoroughly, then put the widest part of the yellow bushing on first, towards the front of the car. Then you put on the washer- one side is flat, one is coned. The coned side should face the bushing, with the flat side facing the big nut. Tighten the big nut down first before attempting to attach the thing back to the body of the car, or you will never get it on... there's just no room.
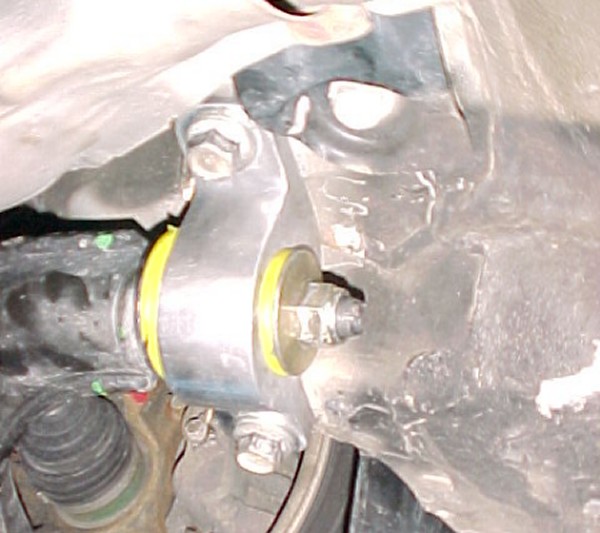
After it's on and tight, attach the ALK block to the body of the car with the 2 supplied bolts and washers and torque them down. Repeat for the other side. If you didn't beat on it too much, an alignment probably isn't necessary, but you could always have it done to be safe. With that done, go out and drive the car like it was meant to be.
Standard Disclaimer: Modification of your car involves risks and may void your warranty. I can not be held responsible for the modifications you consciously decide to undertake nor for the results of doing so.
|
|
