This page details the steps I took to change over the rubber trim around the parking brake to a leather one- I was tired of debris getting caught down in the leftover space. The leather boot I used is a stock Impreza RS leather shift boot, so it matches perfectly. The Subaru part number for it is 92072FC000, and the good folks at SubaruProParts.com will be glad to order that for you. Any questions or comments I would be happy to try and answer.
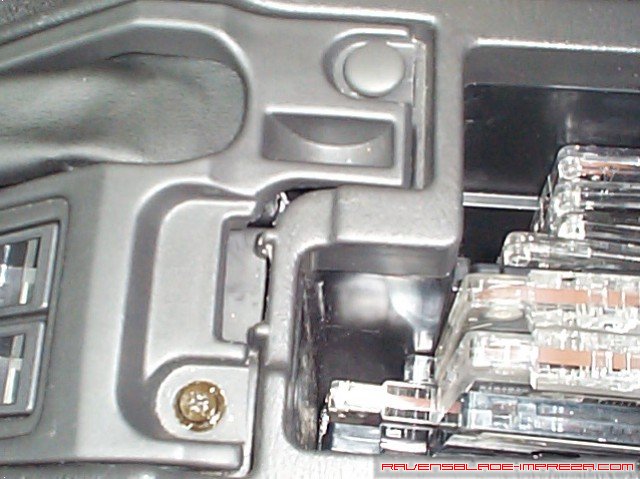
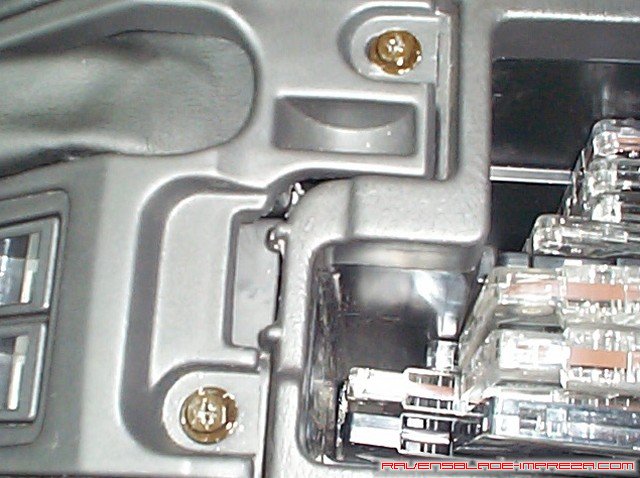
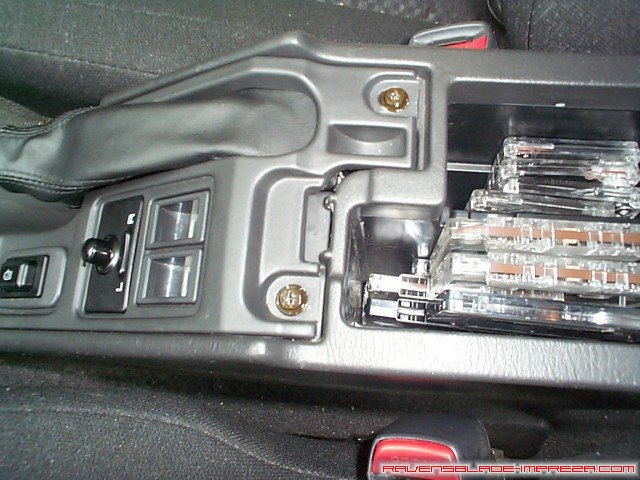
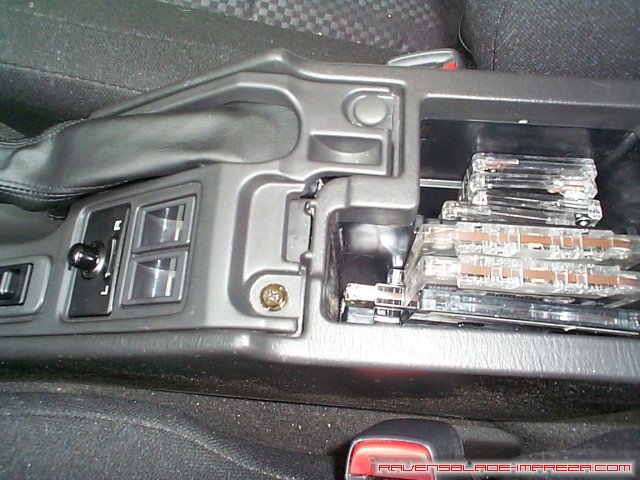
A quick how to remove the center console bits- Make sure the parking brake is engaged, and then open the center console cover, and locate the two screw caps. One has been pulled off above to illustrate. They just pop off if you gently pry up under them with a flathead screwdriver. There are two phillips screws that need to be removed under those caps, as seen below.
After removing those, pull up and forward on the center console, lifting it up and over the brake lever. Disconnect the harness for the mirror controls and pull the console out of the car.
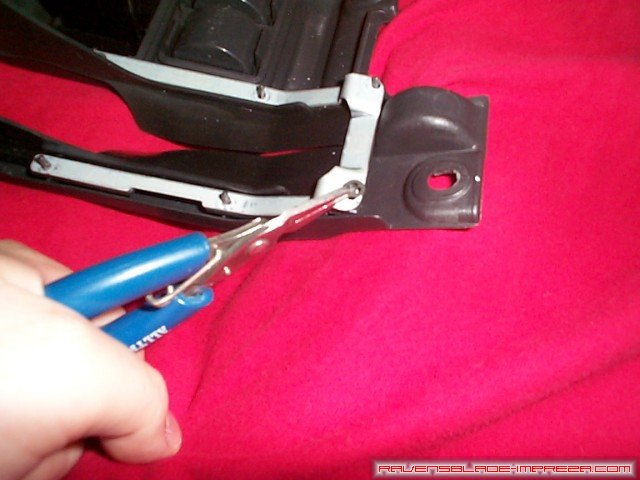
On the backside of the console, you can see where and how the rubber bits are attached. There is a series of 10 round clips that hold it on. You need to pry up on these gently, so as not to break the plastic posts to which they attach, and set the clips aside for reuse. I found lifting with the edge of a knife or small flathead screwdriver worked well, and then I simply "walked" the clips up the post. One end has a metal "ring" that will need to be pulled off the posts first before the rubber will come off. Save this ring as well.
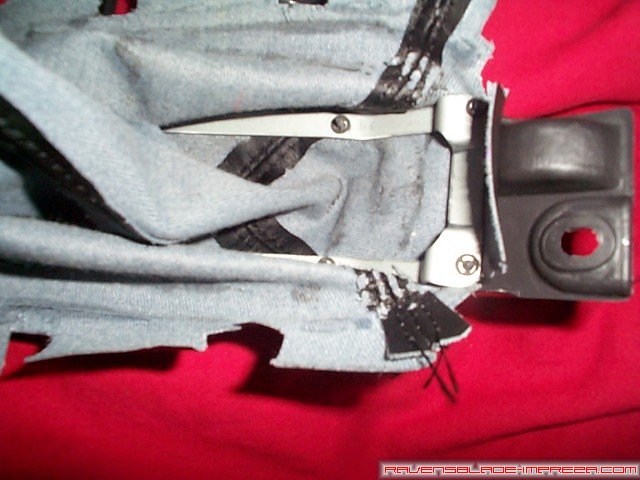
With those off, simply arrange the boot in the opening, making certain to leave enough play in it so that the parking brake lever will operate smoothly. You can use a sharp knife to nick the leather boot in the places where the plastic posts come up, and then push the posts through the material. Place the metal ring back on, and simply push all of your clips down. At this point, you will need to cut the threads at the top of the leather shift boot a little bit. This will allow you to remove the plastic ring inside it as well as make the opening large enough for the parking brake lever to fit through. Snip a few threads and then test to see if it fits over the parking brake- you do not want to cut down more than need be, so take your time to do it correctly.
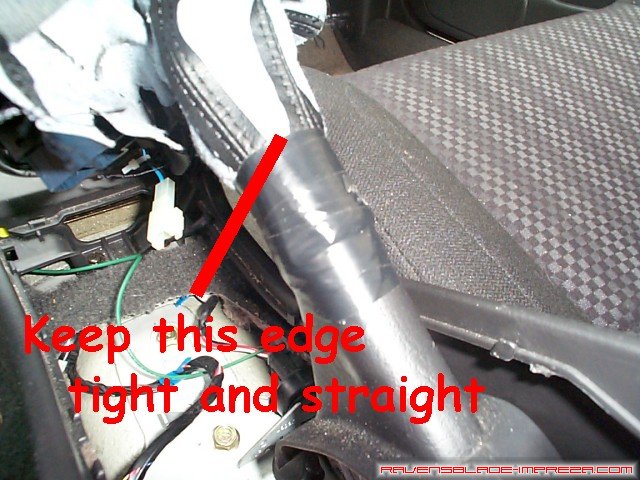
When you can get the boot over the parking brake lever, push it down until there is about a hand's width of lever that will remain exposed. With that, I simply used electrical tape to affix it to the parking brake lever. Using only tape instead of some form of glue makes it removable if need be. The top edge should be very tight and straight, as this will be where you fold over the boot and it would be good to have a sharp edge.
With that done, fold over the boot, replace the center console, and straighten the boot out a bit. Replace the 2 phillips screws.
Replace the two screw caps.
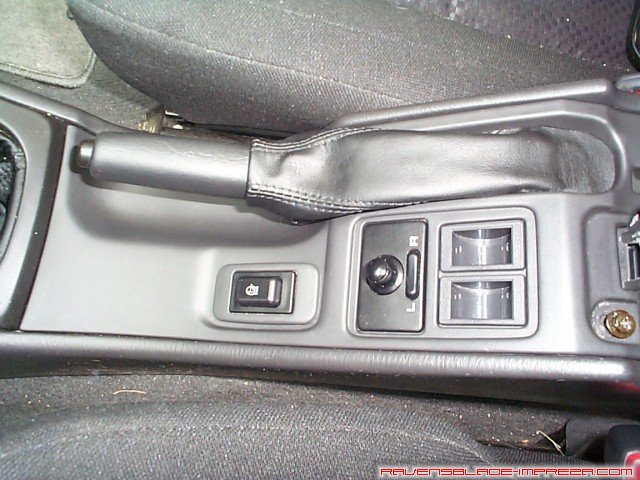
And it is done! It look much better in my opinion, and much cleaner. Best of all is that it looks like it has always belonged there.
Standard Disclaimer: Modification of your car involves risks and may void your warranty. I can not be held responsible for the modifications you consciously decide to undertake nor for the results of doing so.
|
|
