OK, let's face it. Everyone who sees these mudflaps knows how good they are, but who really wants to pay $500 for mudflaps? Not too many people. I took some pains and came up with these patterns for the STi Mudflaps, so you can cut a set of your own and save the money for more important things. Keep in mind, you still need all of the hardware to mount these once you have them cut, as well as the STi stickers and whatnot. It may be helpful to right click and save these pictures and then print them out. Questions or comments may be directed here.
Patterns
For all of these patterns, you will need to double the size. The patterns as shown here are exactly one half as large as full size in the interest of fitting them on a page. The best bet would either be to save them, open them in an image editor, and double the width and allow the program to scale the length or print them as they are, take them to a photocopier, and copy them at double the size. The final real life dimensions will be posted beneath each pattern so you may doublecheck yourself. I suggest using cardboard to make the final template, then tracing the outline on the mudflap material (sheet eurethane) then making your cuts: you can only cut that stuff once, and it is not cheap!
Front Mudflap Pattern
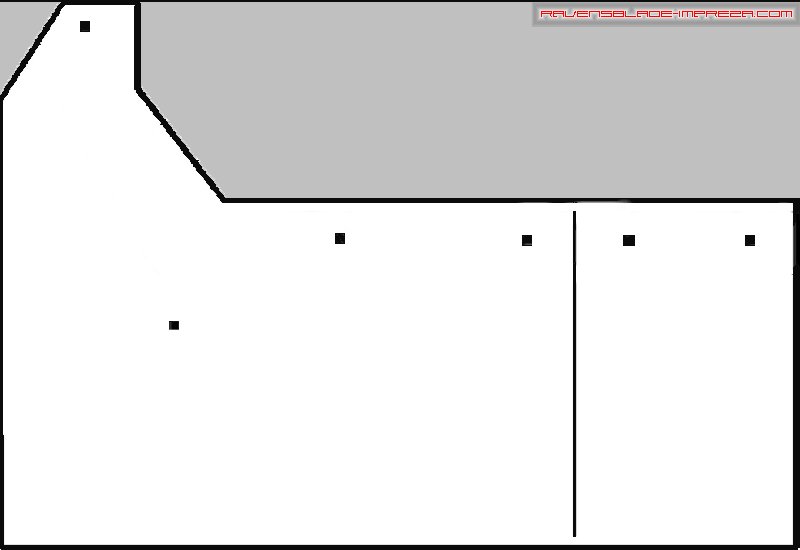
The long black line to the right edge of the pattern is actually meant to be a "crease" in the flap where they bend forward in the front wheel wells to help protect the undercarriage of the car. The overall dimension of the front flap is 16 inches wide by 11 inches high- LOTS of protection!
Rear Mudflap Pattern
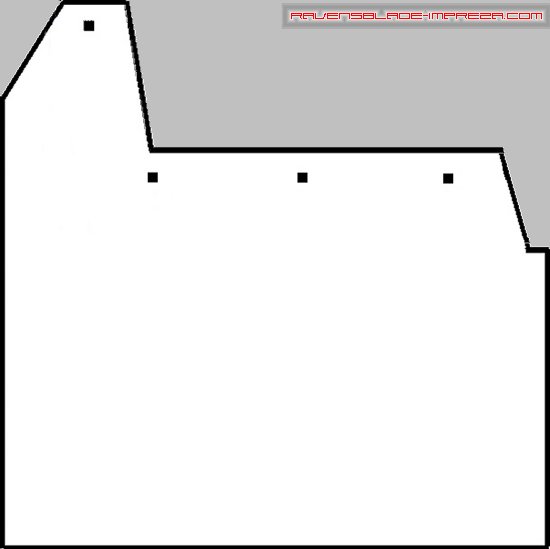
The rear mudflap is very simple, and has an 11 inch by 11 inch overall dimension.
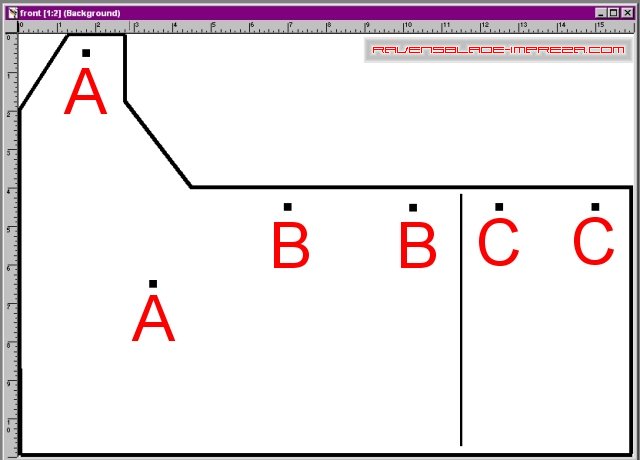
Front Mounting Bracket Pattern
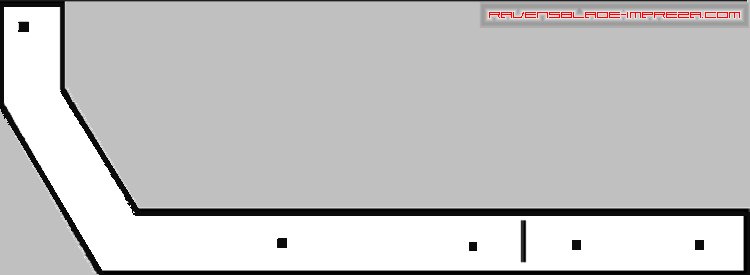
I made my brackets out of stainless steel: it is expensive but strong, and it will last without discoloration over time. I painted all of my brackets and the hardware gloss black, to match the color of my mudflaps, and to help hide the hardware. You can do the same, or polish it up once cut and show it off! The front mudflap bracket will end up at 15 inches wide once you are done, and the line in the bracket towards the right hand side is where a bend needs to be made in the bracket (it is about a 30 to 40 degree bend). This bend will match up with the score you put in the front mudflap, to help the flap bend around the corner of the front wheel well. The black squares in the pattern are where your holes will be drilled.
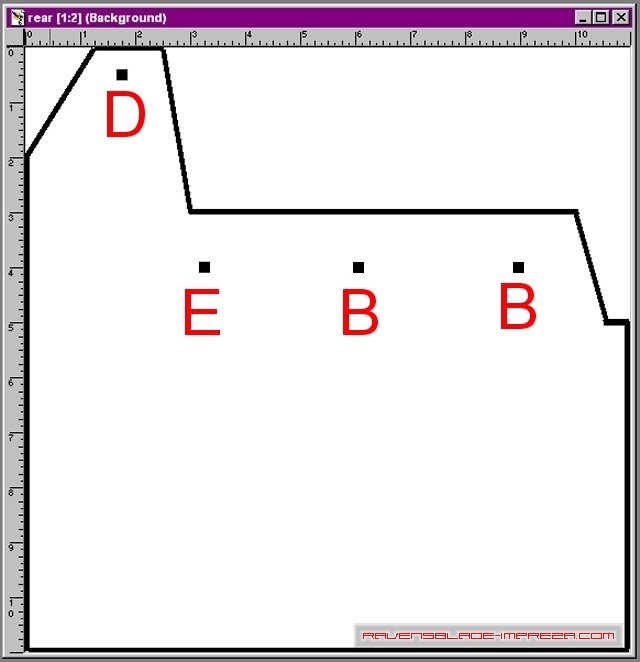
Rear Mounting Bracket Pattern
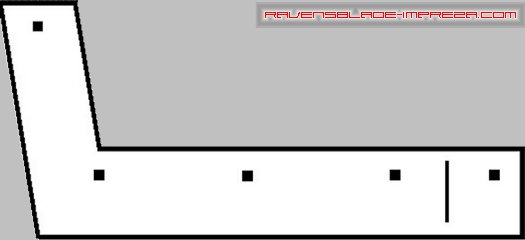
Again, the line in the far right edge is where a bend needs to be made (this one is a 90 degree bend). This should finish up at 10.5 inches wide when it is full size.
Mudflap Material
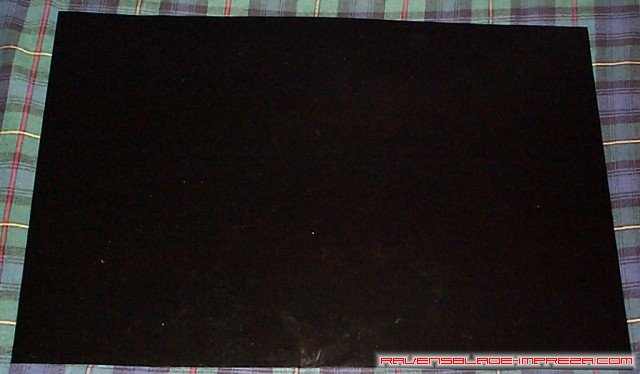
This is the uncut sheet eurethane material for the mudflaps, courtesey of Susquehanna Motorsports. It is about 1/8" thick, and VERY durable and tough to cut.
Mudflaps Cut Out

This is a view of all four mudflaps cut out using the patterns I supplied above.
Some Necessary Hardware
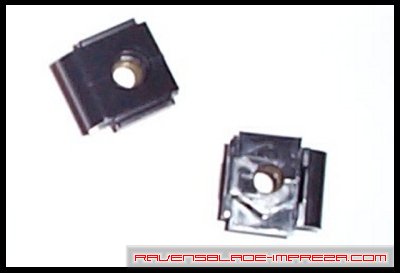
"Clip Nuts" to attach the flaps to the edge of the wheel well. Subaru Part Number 91086AA000: you will need 8 of these (they come in packs of 2, so 4 packs), unless you have the rear spats installed already, in which case you will only need 6 (3 packs).

OK, here is the rest of the hardware you will need: be sure to buy all stainless steel. It is more expensive, but it will last and will not discolor over time. Again, you can either paint the hardware to match the color of your mudflaps, or polish it up and let is shine. Letter "A" is a 5mm thick by 20mm long bolt, which you will need either 6 or 8 of, depending upon how many of the clip nuts you needed. "B" is a self-drilling metal screw, again, 5mm by 20mm. You will need 6 of these. "C" is a short bolt used to attach the flaps to the mounting brackets: they are 5mm by 15mm, and you will need 8 of them. "D" is a small flat washer about 12mm across with a 6mm center hole, used to back the nut that attaches the mudflap to the mounting bracket: you will need 8 of these as well. "E" is a large washer, 25mm wide with a 6mm center, used to keep the head of all of the hardware from pulling through the mudflaps: you will need a total of 20 of these. "F" is the nut for letter "C," and will be a 5mm nut: you will need 8 of these.
Placement Of The Hardware, Brackets, And The Mudflaps
Here I'm going to show how eveything comes together, and quite a bit of the assembly can be done before you get anywhere near your car. I've labelled every different set of fasteners with a different letter. It will all make much more sense as you do it, and in the photos a little further on. Letter "A" is where you will use pre-existing hardware on the car to mount the flaps. If you look inside the front wheel well, you will see the two screw-type rivets holding part of the sideskirt on. You will need to pull them out, put the flap and bracket in place, place one of the large washers (letter "E" in the hardware photo) on the screw rivet, and reinsert through the flap and brakcet. Letter "B" is where you will put one of the "C" bolts and one large "E" washer together, push through the flap, the bracket behind, and then put one "D" washer on after the bracket, and tighten everything down with one "F" nut. Letter "C" above is where you will put one "E" washer on one "B" metal screw, put it through the flap, then the bracket, and then screw it into the inner wheel well. Letter "D" is where you will end up putting one "E" washer on one "A" bolt and put it through the flap, then the bracket, and then into one of the "clip nuts" which will be clipped to the fender. How letter "E" is done depends upon if you have rear skirts on the car or not. If you do, you will need to remove the screw already there, put a washer on it, and then put the screw through the flap and then the bracket, and then tighten it back down in the clip nut already there. If you don't have rear skirts, you do "E" just like we did "E."
Where It All Comes Together
The Rear Flaps First
Ok, now that we have everything ready, lets get these mudflaps attached. I'm going to start with the rears, as they are easiest to do. You may want to remove the wheels to give you more room, but I found this unnecessary. Ok, if you have the rear skirts on the car, you will see something like this in your wheel well:
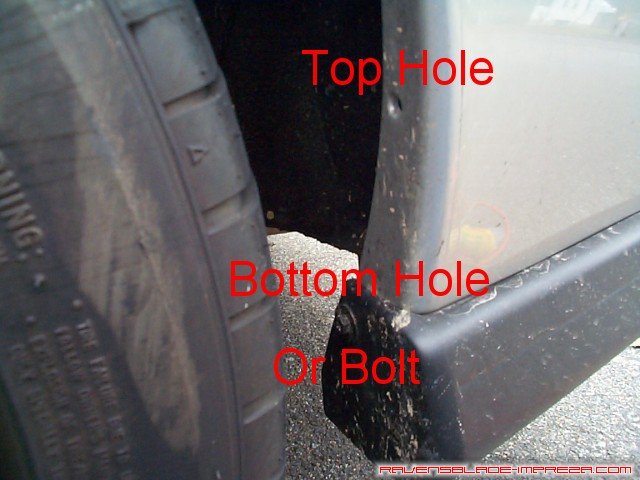
If you don't have rear skirts, you will not find any trim pieces or hardware in your way. If you have the skirts, first thing is to remove the bottom screw holding them on. With that out of the way, everything else is essentially the same. Now, you want to attach the clip nuts to the edge, one for each of the two holes (note: if you had the skirts installed, one clip nut is there already, just put the other on the top hole. Next, get your rear mudflap and bracket, the 5mm bolts (letter "A" in the hardware section), the large washers (letter "E"), and your tools. Start with the top hole. You are going to be putting bolt and washer through the flap, through the bracket, then through one side of the clip nut, through the wheel well edge, and then into the other side of the clip nut. That was a mouthful, but you'll get the idea when you do it. If you have the rear skirts, put the original bolt back in place at the bottom; if you don't have them, do the bottom hole just like the top one. With that done, we just have to attach the far edge of the bracket to the far edge of the wheel well. You can see approximately where in this picture:
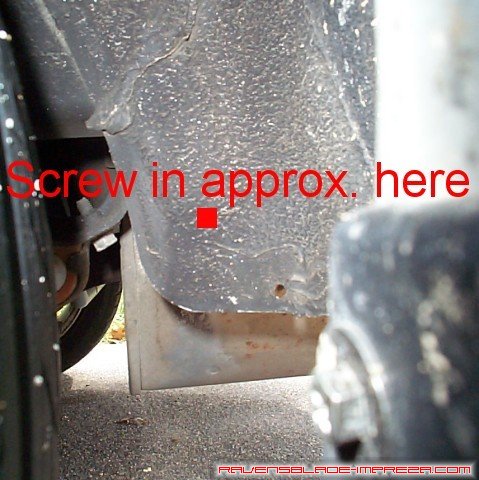
Now, just line the far end of the bracket up with the far end of the wheel well, check to make sure the flap is level with the ground, and screw the self-tapping sheet metal screws (letter "B" in the hardware diagram) into the wheel well, nice and tight. One side is complete! Repeat for the other side, and the rears are done! It will look like this:
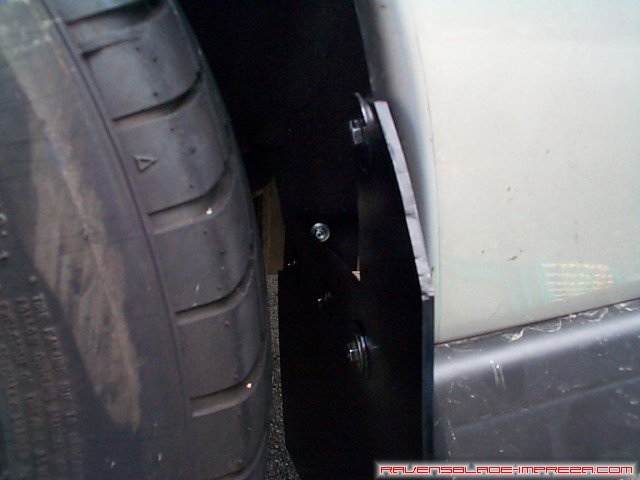
You can see pretty much all of the hardware from this angle
The Front Flaps
The front flaps will take quite a bit longer to install, as removing the wheel is a must. With the front wheel off, you will see something like this:
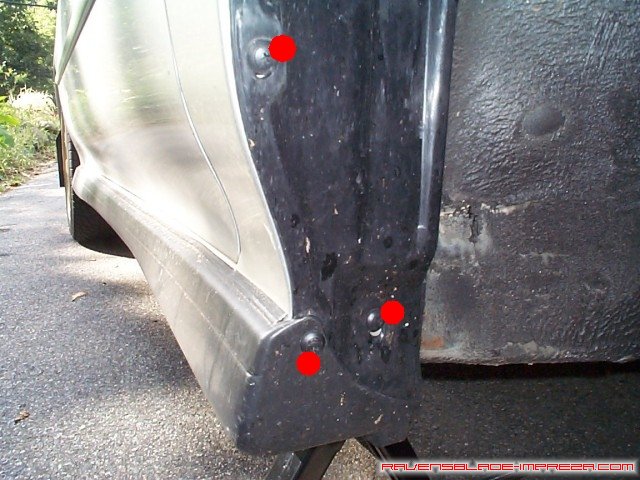
The three objects that look like screws are Subaru's notorious screw-rivets. You actually have to pull the center out first, and then the outside ring will pop out, allowing access behind the wheel well's plastic mudguard. You need to pull out all three. Once the mud guard is out of the way, you can see the metal of the fender, like in this picture (I already have the nut put on):
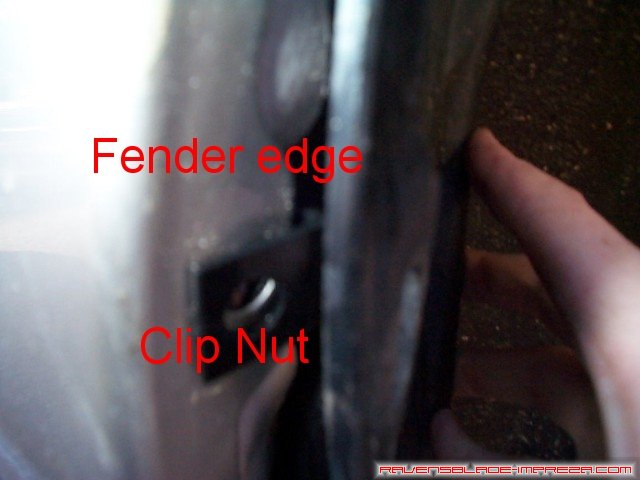
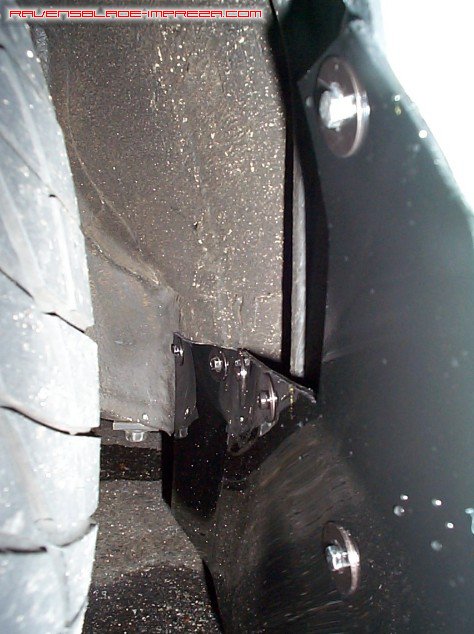
Where the outermost 2 screw-rivets were (on the wheel well edge) we are going to be placing the clip nuts (one on the top, and one on the bottom). I found it very helpful to hold these clip nuts in place with the handyman's helper, duct tape, as they can move when you try and put the wheel well lining back in. Once the nuts are clipped on and the wheel well lining reinstalled, you can put the one screw-rivet that didn't get a clip nut back into it's hole. The rest is pretty quick and painless, and is nearly identical to the rears. Get the 5mm bolts (letter "A" in the hardware section), the large washers (letter "E"), and your tools again. Start with the top hole. You are going to be putting bolt and washer through the flap, through the bracket, then through one side of the clip nut, through the wheel well edge, and then into the other side of the clip nut. Then do the same for the bottom hole. With that done, all we have left to do is to level off the flap to the ground and, using the self-tapping screws (hardware photo letter "B" again) with a large flat washer on them (hardware letter "E"), fasten the far edge of the mounting bracket to the inner wheel well through the two holes (marked "C" in the hardware placement diagram). This is what you'll see when you are done:
Ok, just repeat that for the other side, and you'll be done! They are tough, good looking, and effective, and look great on your car. Some finished pictures of the flaps on my car follow.
Finished Product

A shot of all four
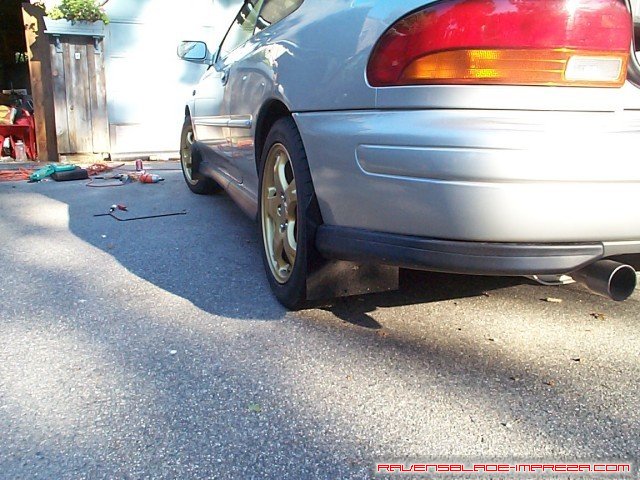
They are wide enough to cover the width of the rear tires
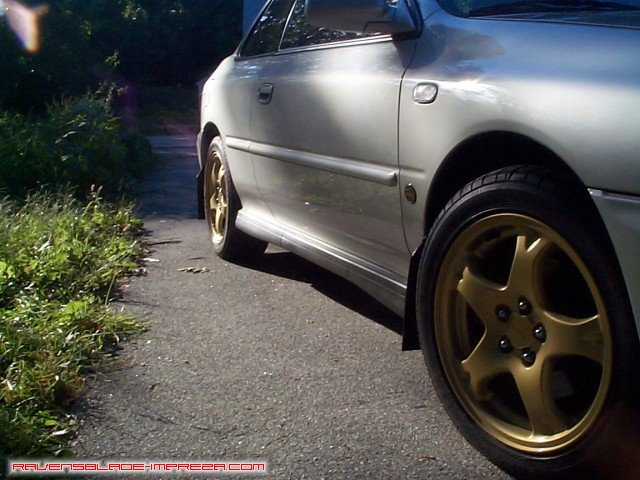
Look good from every angle
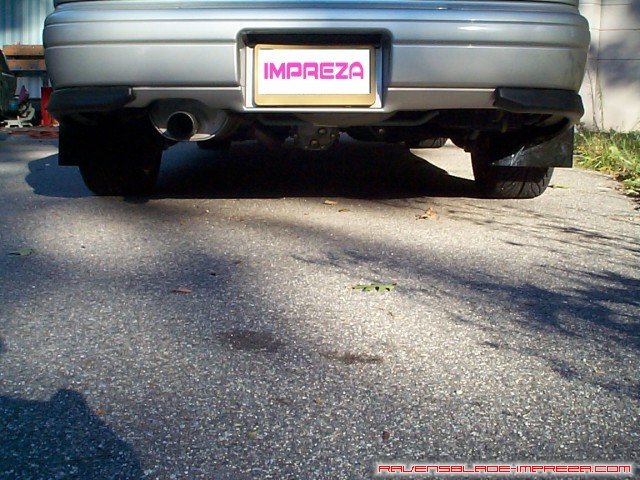
What the competition will see of them
Standard Disclaimer: Modification of your car involves risks and may void your warranty. I can not be held responsible for the modifications you consciously decide to undertake nor for the results of doing so.
|
|
