This is really an easy mod to do, honest! It was my very first modification, and the beginning of this website. You're going to need one two foot by four foot sheet of lighting grill, some sharp cutters to cut it, eight cables ties, paint, and a drill. Comments and suggestions are welcome here.
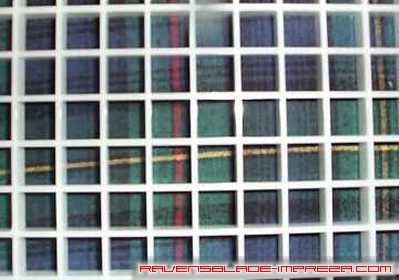 
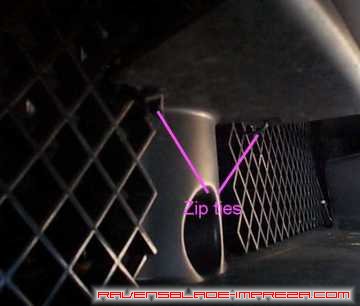
Here we have the major materials- lighting grill and zip ties. Everyone calls zip ties something different, so I post this picture as clarification. You can find the lighting grill at Home Depot, HQ, or a local hardware store, in of all places, the lighting section! It comes in two foot by four foot sections. You may be able to find this grill in aluminum, which is ideal, but it takes much longer to cut and finish. In either case, you need to find the grill that has 1/4" squares so that you end up with full squares across the whole length (you will see what I mean later). Zip ties can be found at Radio Shack or Walmart. I chose black because it matches the final color of my grill. If you end up making a blue grill or silver or some other color, I would recommend the natural white color zip ties, which you can paint with hobby paint and a brush, after the grill is attached. Painting them first will NOT work, trust me.
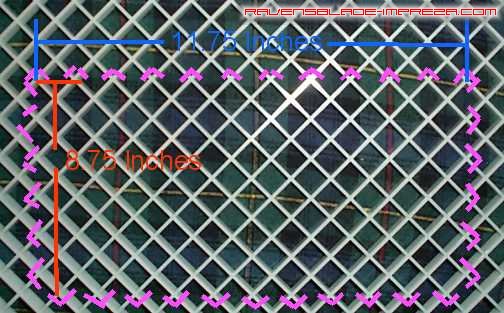
What you see above is the measurements you will need to make (these are in red and blue) and the location of your cuts (these are in purple). The picture is just for illustration purposes- your grill will be bigger than this. This is where the 1/4" grid squares become so important. The grill is going to be 11.75 inches long and 8.75 inches wide, and you are going to make two. These measurements fall exactly on the intersection between squares, because they are 1/4" apart. If you use any other size grid square, you will get partial squares at the edge, and it honestly would look horrible. Get a brand new (or very sharp used) pair of flat clippers to make your cuts. Sharp cutters will go cleanly trough the grid, dull cutters will break the grid. To save yourself extra work finishing the grid, make your cuts as close as possible to the intersections of the squares. This will minimize the need to sand the edges smooth before painting. Two of your corners are not going to be perfect, but that's OK as they will be hidden anyway.
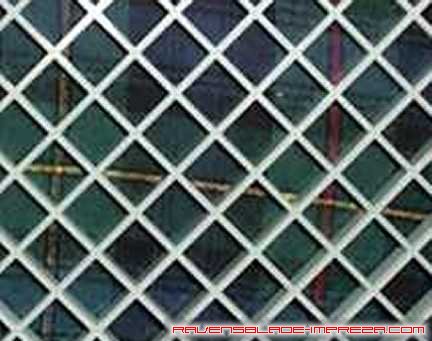
After you make your cuts, your grill pieces will look much like what you see above- it will be rectangular with some small burrs on the edges. I found that a Dremel rotary tool is great for cleaning off the edges, though a block of wood wrapped in sandpaper or a wood rasp will also work. Just get nice, clean edges. Because one whole 11.75 inch long edge will be hidden, you only have to work one long edge and the two 8.75 inch edges clean. Once sanded, you need to rinse off the grill pieces thoroughly before painting, as bits of plastic and sandpaper dust will ruin your paintjob. Let it dry completely, as water will also ruin your paintjob. I highly recommend either using Epoxy paint or Rustoleum paint, as they are both very tough outdoors enamels that will take the abuse of road grit. Choose your color and apply several light coats of paint from both sides. It is far from easy to fill all the crooks and crannies of the lighting grid, but be patient and take your time to get good results. Once fully dry, it's time to head out to the car.
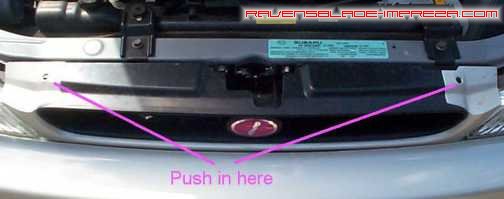
Just in case you didn't know how to get your main grill off, here you go. See the two holes in either end of the grill? GENTLY push a flathead screwdriver straight down into these holes one at a time, and gently pull the edge towards you. The top will pop out. Go and do the other side, and then pull up and out, and the grill will come right off.
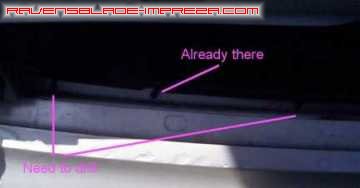 
Looking down at the front bumper, you will notice two holes, about six inches off the center point of the car, at the very rear of the bumper (labeled "already there" in the picture). These holes, and the two marked "need to drill" will secure the top of your grill. The size of the drill bit is largely dependent upon what size zip ties you have. Make your holes just big enough to get the ties through. Use a metal drilling bit, as there is metal underneath the plastic bumper cover. Once you have your holes drilled, make sure you clean up the burrs around the hole and then paint over the bare metal parts of the hole. This is very important to keep the holes from rusting out! Also, don’t use the holes “already there” when you zip tie the grill in place- it puts too much stress on the grill to bend it that much, and the last thing you want to do is break it when you’ve come this far (I found out the hard way!) Now we can take care of where to place the lower attachment points.
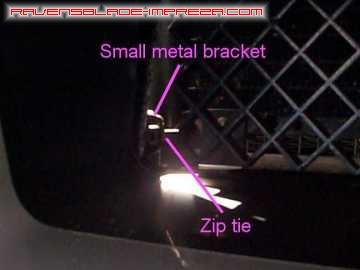 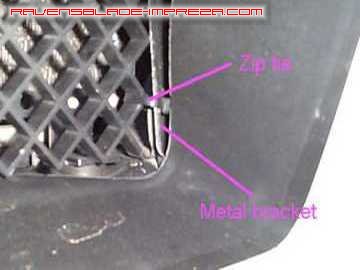
As you could probably tell, my grill is already in place, and I'm documenting it after the fact- but I think you're getting the idea. In the lower corners, you can see metal brackets just on the very edge of the opening in the lower bumper. Using your drill, you're going to drill one hole in the left one, and one hole in the right one. The angle is awkward, but you should be able to set the drill in at an angle and drill right on through with that metal drilling bit. Please be careful not to damage the radiator! I would place a piece of scrap wood in front of the radiator, just to be safe. Again, make sure you paint over the now exposed bare metal, to prevent any rusting.
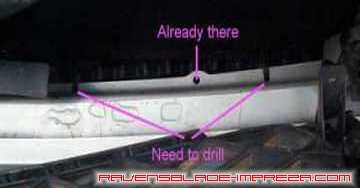
Again, we have a case of awkward angles! The last two holes to secure the grill need to be drilled through the plastic just above the center support. The picture should give you a good idea. You need to make two holes, one at each side. Try to keep the hole away from the edges, as when you pull the zip ties tight, they may pull through. Again, please take care in drilling, and do not damage your radiator!
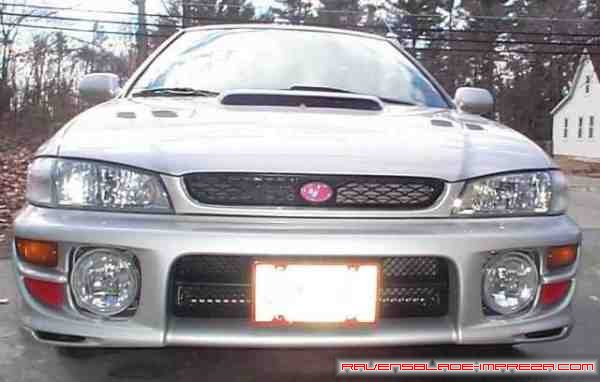
OK, we're in the home stretch! Take one of the grill pieces and gently slide it down from the top (where the main grill was) in front of the radiator until it hits bottom. I would suggest zip tying the lower right and lower left corners first, as these are the hardest to do. Pull the zip tie through your drilled hole and then back through the grill. Secure loosely for now, until the other ties are on. Do the center ties next, leaving the top two for last (you can use these two to make sure the grill is even). Tighten the ties down all around (not too tight, you could break the grill). Repeat for the other side. Cut off all of the tails on the zip ties as close to the head as you can, to obtain a clean look. Done right, you never see the zip ties! Gently reassemble the top grill, close the hood, and you're done! The finished product will look something like this...
I'm not going to expound upon how strong this grill is, but my main intent was to provide some protection for the highly exposed radiator. Done in aluminum, I'm sure this would prove a healthy barrier to stones and debris, but is a good looking, functional, worthwhile, and inexpensive mod nonetheless, and it won't take your whole weekend to complete.
Standard Disclaimer: Modification of your car involves risks and may void your warranty. I can not be held responsible for the modifications you consciously decide to undertake nor for the results of doing so.
|
|
