This bushing is the last bushing I needed in a search for a precise, notchy shifter with no slop- it only took an STi Shift Kit, the front shifter bushings, and now this rear bushing to do it. There is now NO vagueness to the shifter at all. As usual, Tom and Mark at Kartboy Kustoms have manufactured an incredible product that fits and performs flawlessly. I will warn you that this is an extensive mod, and if you are planning on changing out your front shifter bushings and/or your shifter, now would be the time to do it. That being said, it is not hard to do- you are just working in confined spaces (hence some of the poorer pictures or lack of pictures to follow). If you should have any questions about this modification after reading this page, email and ask.
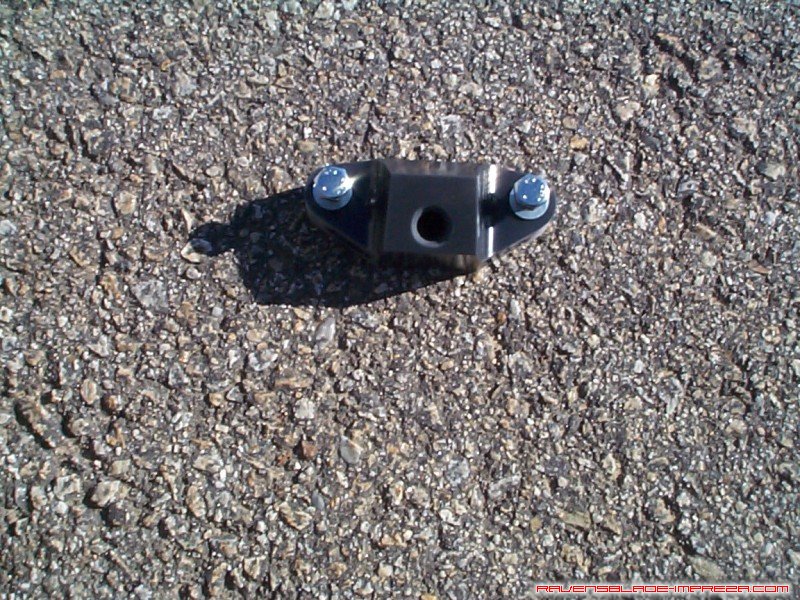
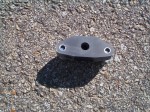
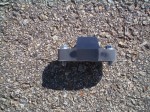
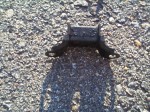
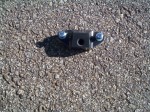
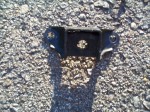
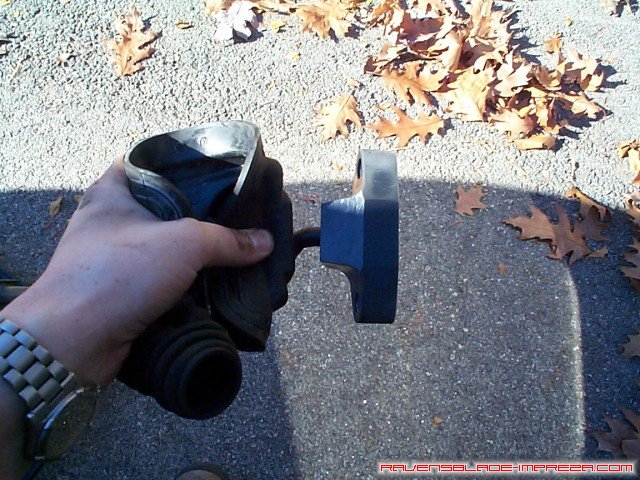
The stock rear shifter bushing, like most of the stock bushings on the Impreza, are compliant rubber bushings. These are generally used to reduce noise but generally result in "slop" in the places they are used- they are soft and therefore have some "give" to them. The last place I want "give" and vagueness is in my shifter, and the general upgrade path involves chaning out the front shifter bushings to improve the feel. This modification replaces the rubber bushing at the far end with a hardened bushing (the stock bushing is so soft, you can deform it with just the pressure of your fingers!). The Kartboy bushing itself is much more massive beyond it's inherent stiffness, and the increase in crispness of the shifter is noticeable and impressive. I have a few comparison pictures of the Kartboy bushing versus the stock rubber bushing below.
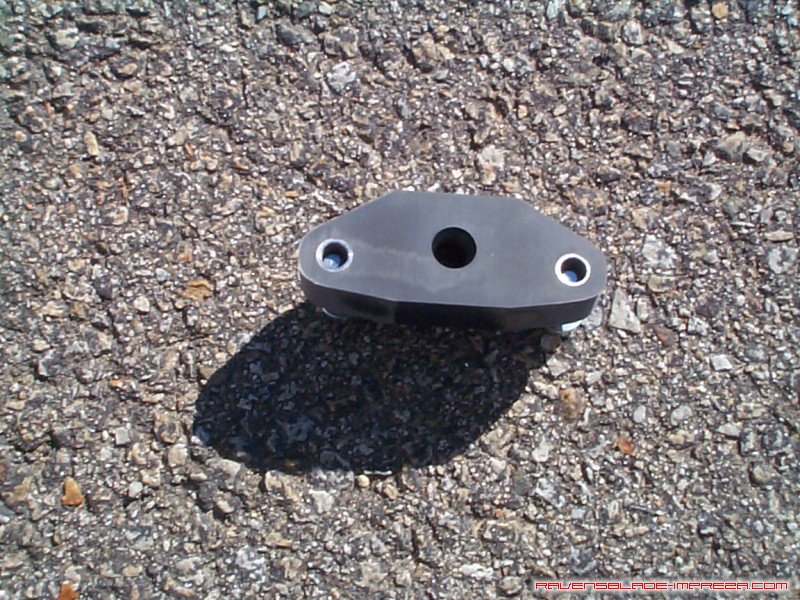
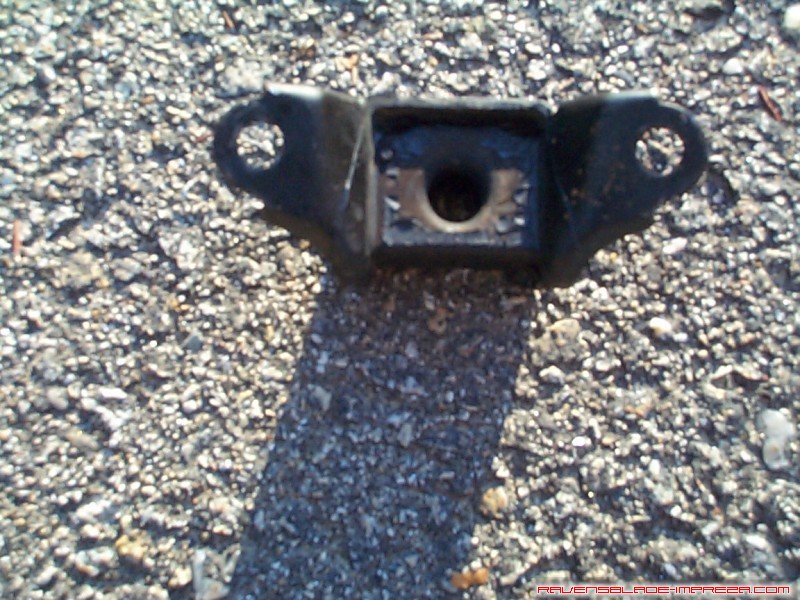
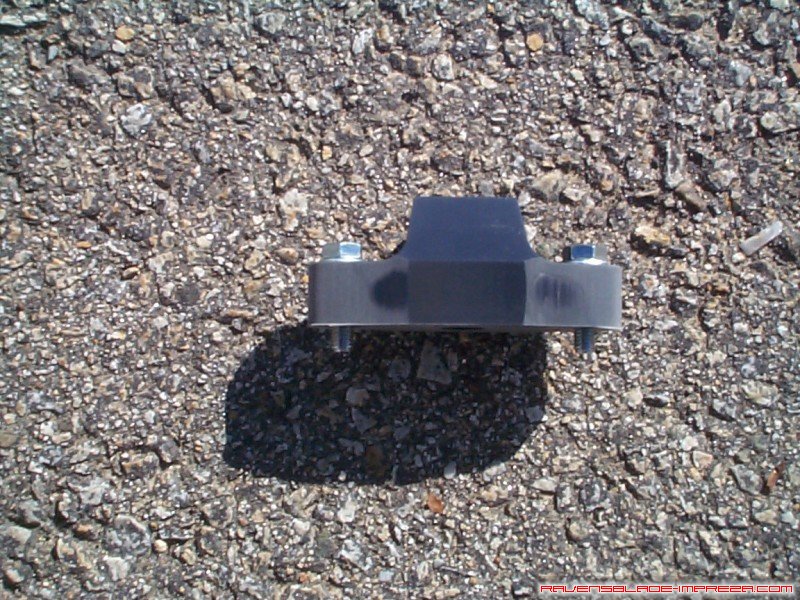
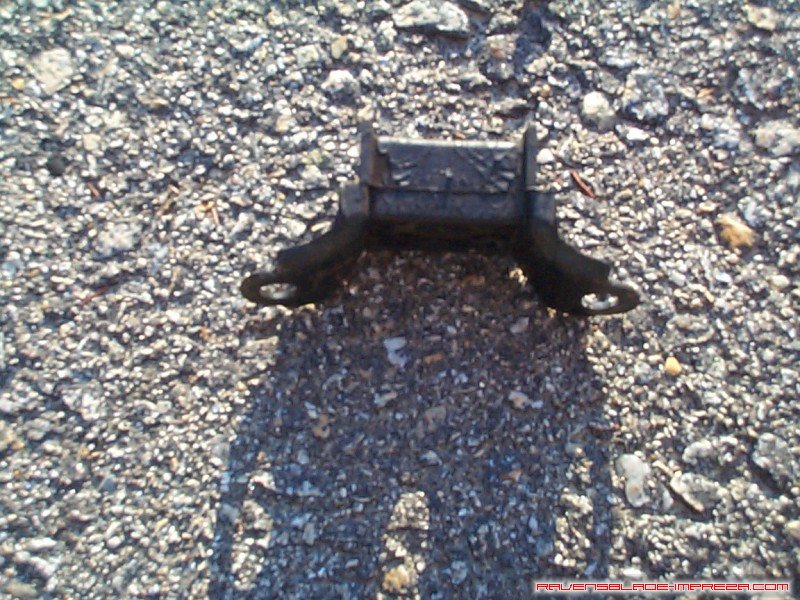
| Kartboy |
Versus |
Stock |
 |
Back |
 |
 |
Side |
 |
 |
Front |
 |
Ok, the back story and comparisons are done, on with the modification!
Start inside the car by removing all of the center console trim. Open the center glove box and remove the two screw caps by prying gently with a flat-head (-) screwdriver or other small implement.
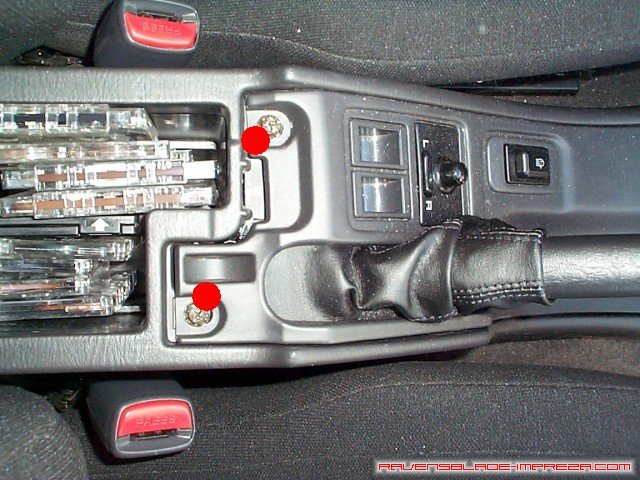
With the screw heads removed, use a phillips (+) screwdriver to remove these two screws, and pull the trim around the parking brake out of the way.
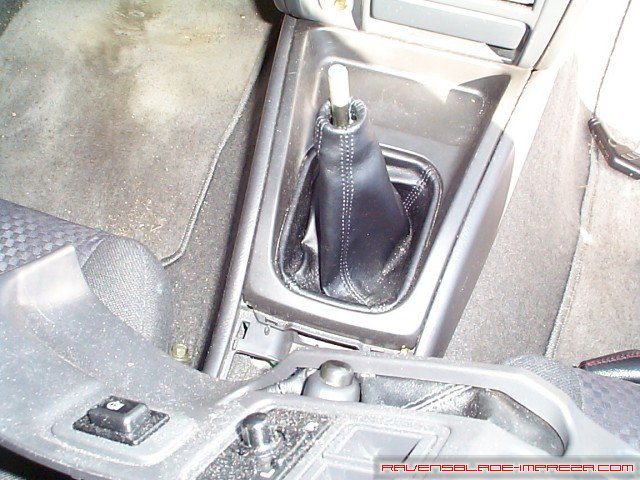
Remove your shift knob by turning counterclockwise (this will take quite some time due to the fine threading) and then pull up to seperate it from the shift boot.

With the shiftknob off, pull up and back on the shifter trim and remove it completely. There are four plastic screw clips holding a sound deadening pad on the transmission tunnel. Remove these like a normal screw by going counterclockwise.
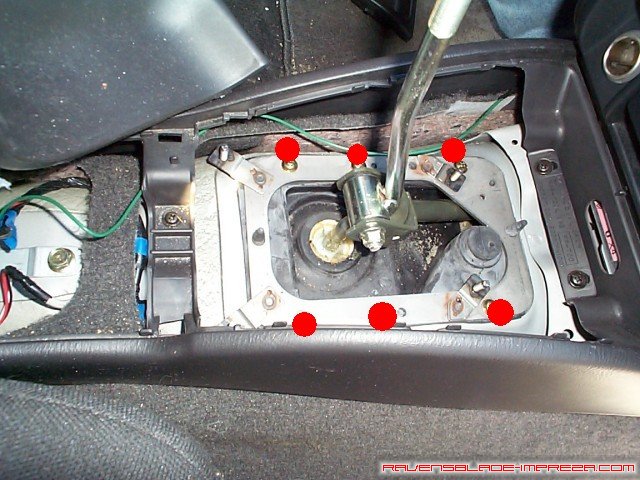
With the sound deadening material off, you will see a metal ring with six screws in it- these also need to be removed.
With the six screws off, remove the metal ring.
With the metal ring off, you now need to remove the shifter lever. You will need 2 12mm sockets or wrenches to remove the center pivot bolt.
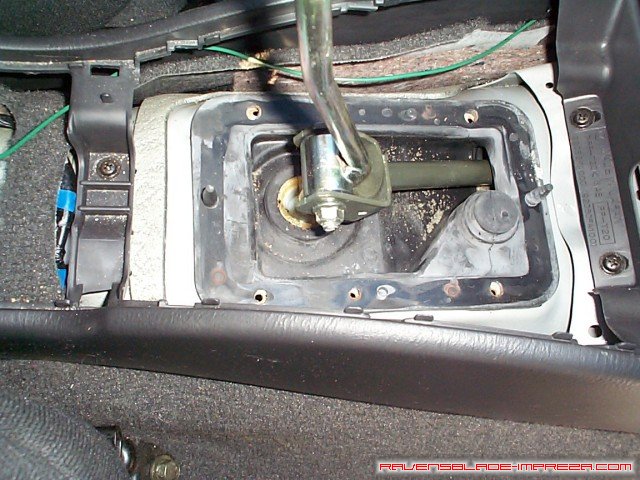
With the bolt removed, simply pull the shift lever towards the 2nd/3rd/reverse direction and it should pop right out of the white ball socket.

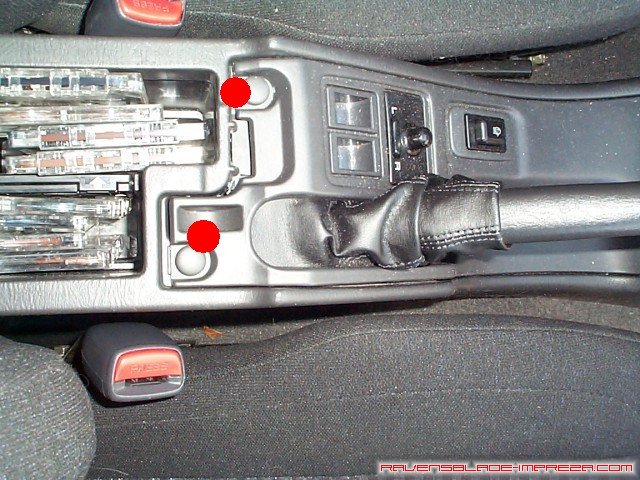
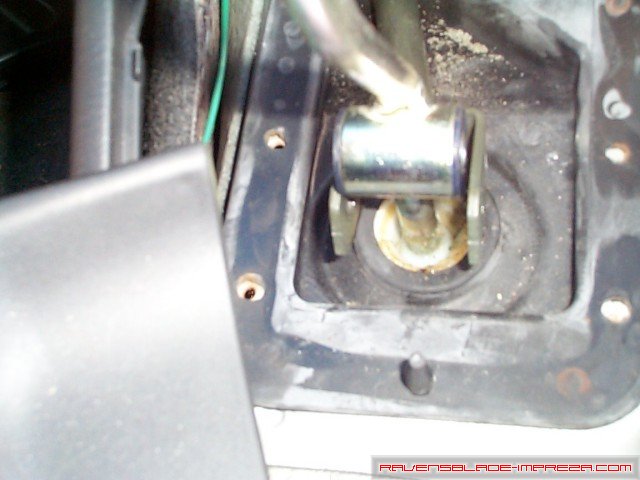
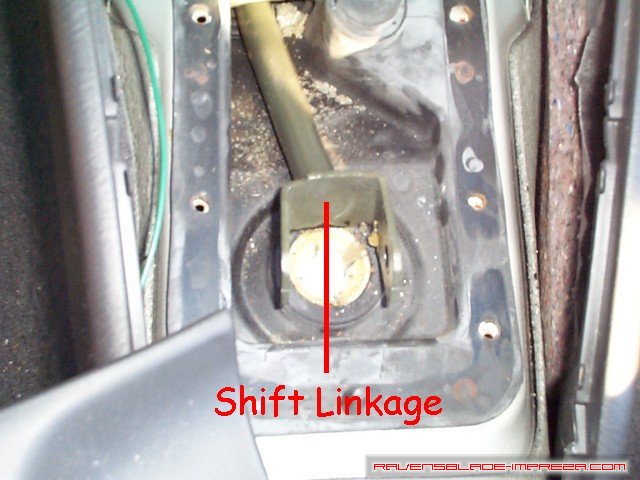
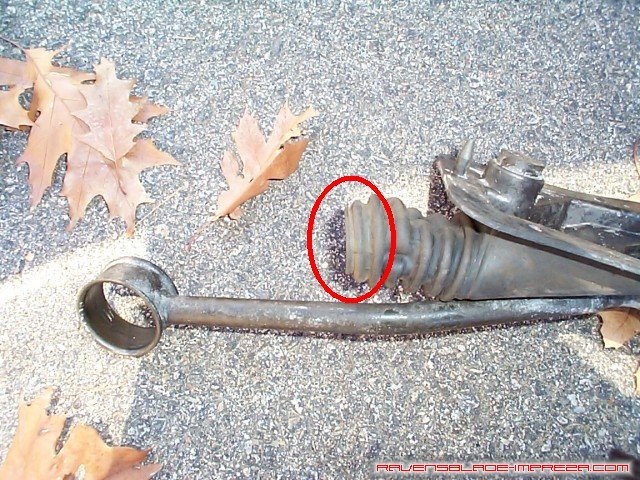
If you pull up on the rubber boot material left in the transmission tunnel opening, you should be able to see the stock rear shifter bushing. It it tucked up under a lip (which if it was not, would make this mod MUCH easier). The approximate location of the shifter bushing is outlined in red in the above photograph. It is now time to head underneath the car.
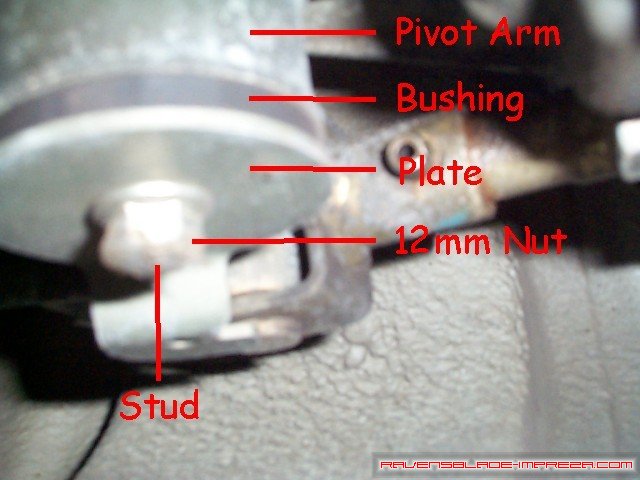
In this picture, you can see where the front bushing resides - you will find this just above and in front of the rear catalytic converter on a 99-2001 RS (other models are fairly similar). For reference, this photo was taken from directly underneath the area in question lookup up. There is a 12mm nut, a plate, the shifter pivot arm, and then the front shifter bushings all bolted together through a stud on the transmission. Remove the 10mm nut, and pull the bushings and pivot arm off of the stud.
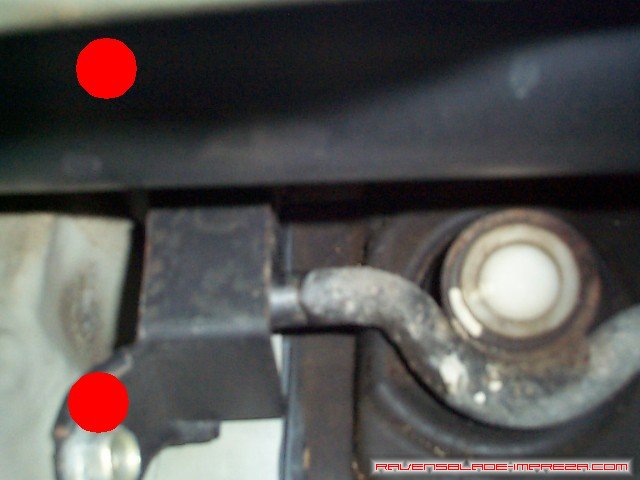
This is where the pictures start getting bad/sparse/non-existant; I apologize, but you just cannot get a camera in some of these places. Small hands are helpful, as is removing the heat shield above the catalytic convertor. I chose not to, and frankly, I'm a bit scraped up for having done so. At any rate, the only thing holding the part we need out is the two bolts holding the rear shifter bushing to the body of the car. They are marked with the red dots (one of course you cannot see, but I marked its approximate location). They are 12mm bolts- very hard to get at 12mm bolts mind you. I found it best to loosen them up from underneath the car (they are not torqued down much at all) and then finish the removal from inside the cabin. Basically, pull the rubber away like you did 2 pictures ago and remove the bolts (if you are in the car and turning these bolts, make sure you turn towards the right to loosen, as you are "in front of" the bolt, not "behind" it anymore). Whether you removed the bolts from the inside or underneath the car, you need to get back inside now.
In an effort to get a good picture, I took this one with everything out of the car. There is a large round disc on the shift pivot arm that the rubber boot (encircled in red) slips over. It is a pain in the tail to get it off, as you have to feel your way down the shift linkage to find this. Once off the round disc, you have to back it all the way up the shift linkage (it will be fun, trust me). Once the rubber boot is off the shift linkage, you should be able to remove the whole assembly from the car- pull up, twist, yank, etc. and you can pull the whole assembly inside the cabin of the car (having tried pulling off from underneath the car, I highly recommend doing it from the inside).
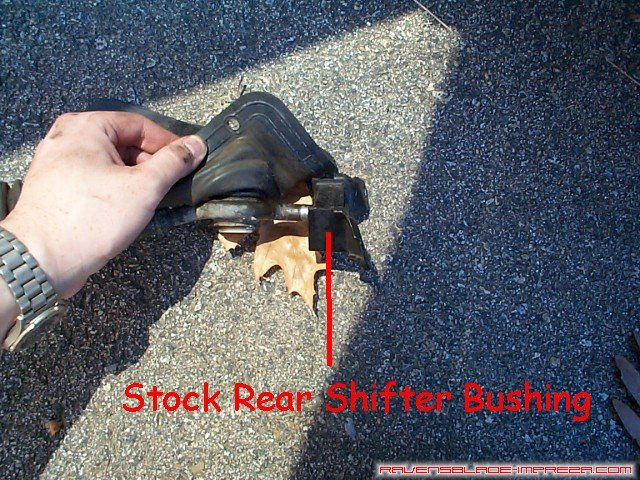
With the rubber boot/ball socket/pivot arm assembly out of the car, you can see the stock rear shifter bushing at the end of the pivot arm. Basically, you get to take out pent up frustration at this point- grab the rear shifter bushing in one hand, the pivot arm in the other, and pull. It should pop off with a bit of pulling. Now, we're halfway done!
Next step is to get the Kartboy bushing back over the pivot arm- prepare for battle, this will not be enjoyable, and I have no good photos to share of this step. The Kartboy bushing is much firmer, therefore that much harder to get the new bushing on. I found that a little grease helped ease the pivot arm through the bushing. Basically, grease the bushing, grease the pivot arm, and start "walking" the bushing over the end of the pivot arm. A bench vise would be most helpful- you can clamp the pivot arm in place and use both hands to force the pivot arm through the Kartboy bushing. Constant pressure works MUCH better than trying to whack it through with a hammer.
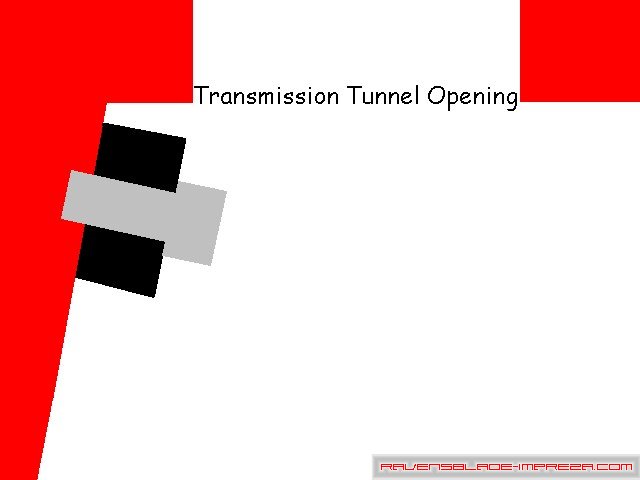
This would have been the most impossible picture to take, so I will use a very bad graphic to attempt to demonstrate what is going on here. When you push the rubber boot/ball socket/pivot arm assembly back into the hole in the transmission tunnel, it will become apparent that the Kartboy bushing, like the stock bushing, only fits one way. This graphic is what you would see if you had x-ray vision and could see through the side of the transmission tunnel. The red represents the body of the car, the black the Kartboy bushing, and the gray the bolt used to attach the Kartboy bushing to the body of the car. Basically, I wanted to highlight the fact that the bolts will be pointing downward at an angle to the ground when the bushing is installed properly. Start them with your fingers, getting one side started and then start the other one before tightening one side fully (it makes it easier to start the bolts if both sides remain loose). You should be able to tighten these two bolts nearly all the way with just your fingers. Once they are nearly seated, tighten them down with a socket wrench.
Now, all that is left is reassemble the tattered remains of your shifter- reattach the front shifter bushing on the stud (plate facing out and the hook on it facing forward), and then tighten the nut. Go back into the cabin, work the rubber boot back over the shift linkage, replace the shift lever with a good whack, replace the pivot bolt, the metal ring, the sound deadening, and all of your console pieces. Take the car out for a test drive, and revel in the pleasure of a shifter with much less (or, in combination with the front shifter bushings and a short shift lever) almost no shifter slop and a much crisper feel overall.
Standard Disclaimer: Modification of your car involves risks and may void your warranty. I can not be held responsible for the modifications you consciously decide to undertake nor for the results of doing so.
|
|